Showing posts with label Nursery. Show all posts

12.08.2010

ScotchBlue Alert!!

Can you believe it? I recently wrote an entry on “Baby Andy’s Bachelor Pad” and mentioned that I used ScotchBlue Painter's Tape when striping his nursery and they picked up on it! ScotchBlue tweeted about my project earlier today, so please take a look at their twitter page. They say "Baby Andy is lucky! Check out Becky's amazing striped nursery."

Since decorating Andy’s nursery, I have stenciled Adie’s hallway and my good friend Ann’s powder room, always using ScotchBlue Painter's Tape to guarantee perfect results! Please check out their twitter page today!


11.02.2010

Baby Andy's Bachelor Pad is Decorated

In our last blog, I talked about striping Baby Andy’s room to look like wallcovering. It is so great to do this, since if you don’t like it or want to change it, it is an inexpensive paint job to fix. Of course, we all loved our results. Now it was time to finish the job.

Remember we are using the Owls Sky pattern from Dwell Studio. It is
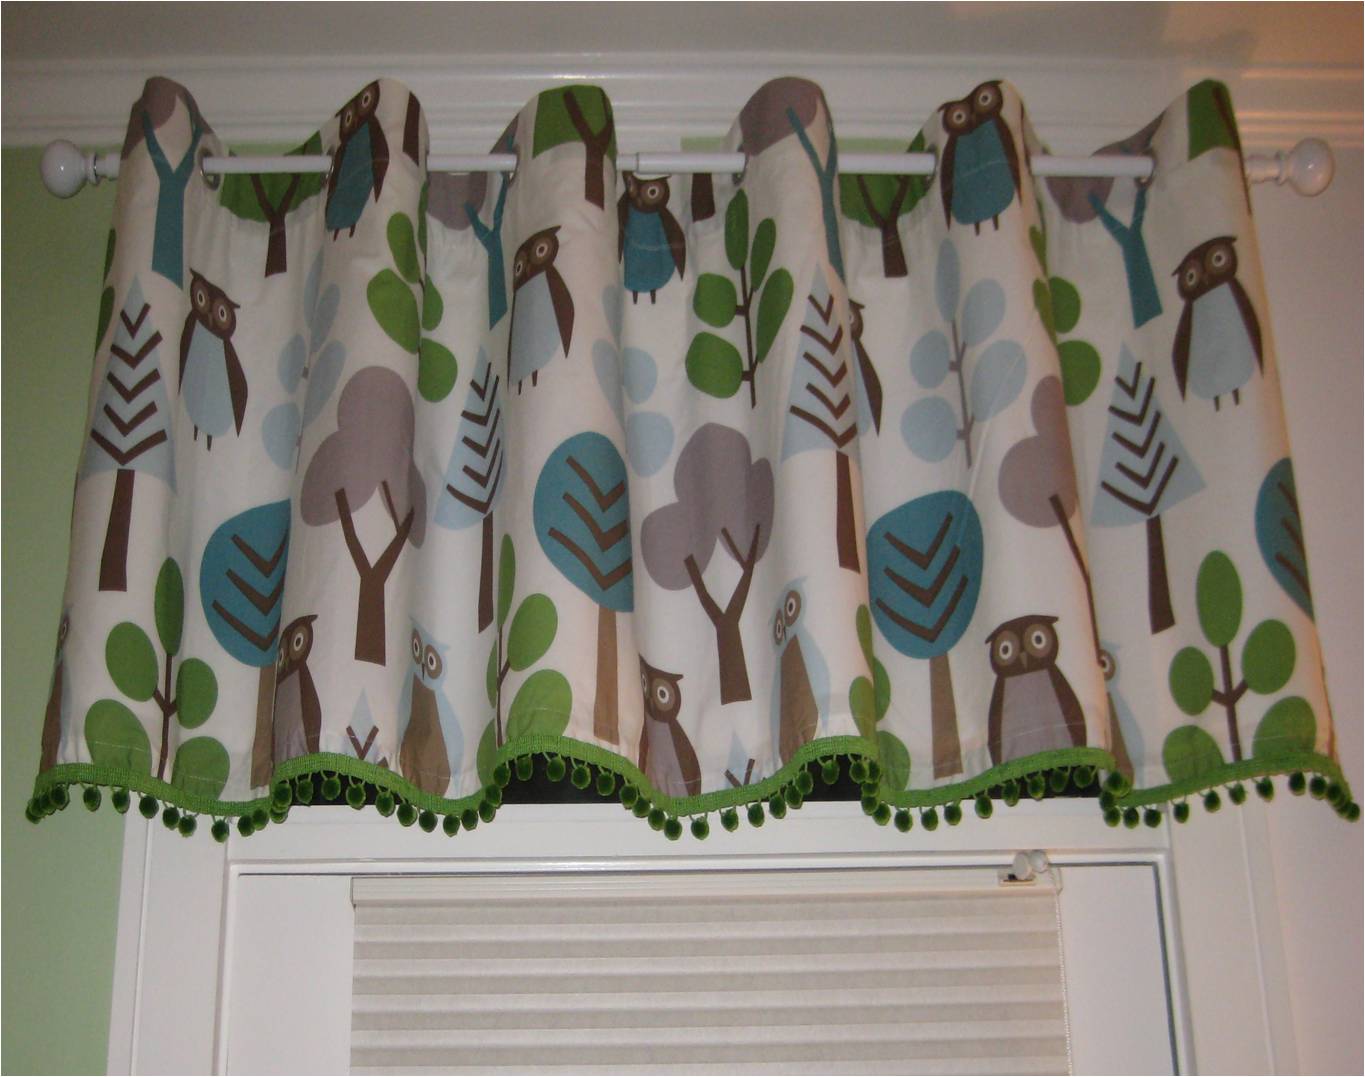
a charming owl and tree print fabric in a soft mercerized cotton. The colors are so perfect – turquoise, green, brown and gray on a white background. When Adrienne ordered the crib ensemble, we found we could order a lot of different pieces (pretty much any baby thing imaginable) but we could not order fabric by the yard. We needed this so I could make a window treatment.

So, we improvised. Adrienne ordered the matching shower curtain - a nice 6’x6’ piece of beautiful patterned fabric in a smaller scale than the crib quilt. Perfect for a window treatment. The shower curtain
had a nice top treatment with grommets, and instead of cutting them off and making a casing, I kept the buttonholes and cut from the bottom, the measurement I needed plus yardage for a 2 ½” hem. I then lined the fabric, very simply with a plain white good quality lining – lining is essential, as it keeps the “body” of the fabric in place, doesn’t stretch and protects the main fabric from sun damage. I simply cut a piece of lining and neatly attached it. I then added a cute green ball fringe to dress it up and we were ready to go.

The baby’s room window measured about 3” across (it is a transom area above a door), so the 6” width was perfect. You usually want to double your measurements to get a nice fluffy treatment. I purchased an inexpensive white rod with a ball finial at K-Mart from the Martha Stewart line and hung it up. It is adorable.


I used some of the remaining bits of fabric to cover a night light shade I bought at Hobby Lobby for about $8. I have seen it online for ½ the price. I added the ball fringe to this also and it was ready.

I found a wonderful chocolate brown rug at HomeGoods in a 4'x6’ size and we placed it in the middle of the room. The deeper color was essential as little Andy’s room leads out onto a wonderful deck. I figured it was a high traffic area and a sweet pastel rug was not such a good idea. It has a circle pattern in turquoise, grey and white.

Of course there was some remaining fabric, so I found a wonderful laundry basket with handles at Tuesday Morning. It had a striped lining, so I removed the lining, took it apart and used it as a pattern. I cut out pieces from our pretty owl fabric, sewed them together and made a new lining for the basket. Instead of heavy fabric ties, I used a lime green ribbon to thread threw the casing. It now houses baby wipes and diapers in Andy’s room.
Adrienne and Jim purchased classical white furnishings – crib, dresser (doubles as a changing table) and bookcase. The final touches were very personal – photos of the grandparents (that’s me) and original whimsical pieces that hung in Jimmy’s room when he was a baby that his mom had saved. Adie added some classic toys of Jimmy’s (like the talking phone every child owned) and Archie and Jughead that lived in her room when she was young.


I am not sure what kind of entertaining Baby Andy will be doing in his Bachelor Pad, but he will be doing it in style, I am sure of that. His daddy bought him a shirt that said “Lock Up Your Daughters” and I hope they heed the warning!

10.29.2010

Baby Andy's Bachelor Pad

In our latest blog I introduced you all to our newest family addition - Adrienne and Jim’s baby, Andrew Joseph, born Oct. 2. Before the arrival of little Andy, Adrienne and I worked together on preparing his new room.

Adrienne purchased the Owls Sky collection design from Dwell Studio, a company with interesting patterns, (not standard issue Babies “R” Us) with bea
utiful color combinations. Stephanie, Baby Jackson and I were visiting about 5 weeks before Andy was due so I could help with the baby’s room décor.

Their Boston apartment is done in greyed turquoise and deep lime greens with raspberry accents. Since it is a city space (which means smallish), she wanted to use a color for the baby’s room that worked with the rest of the place
– no jarring differences when you entered his room. But, we also wanted to make it very special. So, when Jimmy frowned on wallcovering I came up with the idea of painting it in stripes that would echo wallcovering.

When I was married in 1973, I wanted to make our first apartment very special too, so I striped the walls in the bathroom in a hot pink and white. This
was way before I knew about blue painter’s tape, so the results (I loved this room) were uneven and very circus-like. I also made the stripes too narrow in this tiny room so the optical effect was very present. Many a guest, who might have had a bit too much wine or beer came out of that bathroom looking glazed and dizzy.

Well, time has passed and now I truly do know how to stripe a room by hand even though I had not done it in so long. Here is the plan:

You will need your supplies – a good ruler (I think a yardstick in to
o difficult to work with), two rolls or more of ScotchBlue Painter's Tape in 1 ½ “ width, a pencil with a good, clean eraser, a ladder and then all of your regular painting supplies.

First, paint the entire room the color you want the alternating stripe to
be – in our case, white. Then, allow it to dry and leave it alone for a day or two. If you start taping too early, the original paint will peel. We chose Sherwin Williams' Baize Green for our alternating color.

Now, the difficult part is deciding on how wide you want the colorful stripes to be. You have so many choices – they can be the same width, or really any
size you prefer. I was originally thinking of making all the stripes about 8” – thank goodness my daughter-in-law was also visiting, as she reminded me how optic a narrow stripe could be. I happened to have a 15” ruler with me, so that is what I decided to go with.

I began by starting in the corner behind the door – of course our room was not going to be divided evenly at 15” so it was important to start in the least noticeable area. When you finish and have to adjust the stripe width, you can do it where no one will really look.

Begin by measuring out 15” widths down the wall, marking your way with little pencil marks. Do one line at a time, then tape that line. Do not try to get ah
ead and measure more than one line at a time as you will drive yourself nuts and make mistakes.

Here comes the tricky part. When you tape over the white, remember you have to put the tape on the inside line of the white, (which means it is the outside line of the green) so when you remove the tape all the stripes are even. I would constantly check myself to make sure the tape was in the right place, by putting small pencil arrows showing direction at the top each stripe. Always check yourself in a pro
ject like this so when you start painting all goes smoothly and you don’t find out midstream one stripe is the wrong width.

Tape the entire room before you start painting unless you have a partner. In my case, I had Stephanie with me (Adrienne was working). When I had about 2/3 of the taping done, Baby Jackson fell asleep so Steph started the painting behind me, which was a huge help. At the end, I did have to adjust the stripes - all you do is measure the distance remaining (remember I was behind a door) and divide it. I ended up with two stripes being 12”, hardly a noticeable problem.

We had great success!! Peeling off the tape is the most wonderful, satis
fying feeling. There were a few areas where the green paint crept under the tape, but those were so easy to fix with the white base paint. Baby Andy’s bachelor pad was ready for his furniture and all the rest! Check out the finished product in the photos below. In the next blog, I will tell you how I made an adorable window treatment and night light out of a shower curtain!!